There are 4 steps to get started with Amore.
- Download Amore
- Add your app to Amore.
- Add Sparkle to your project.
- Publish your app.
Video
In case you prefer to watch a video, here's this guide as a video (3:35).
Add your app to Amore
The easiest way to get started with Amore is to drag your app binary (.app) into Amore.
You will then have to decide if you want to host your app on Amore or self-manage an S3 bucket.
It's recommended to select Amore because the setup is simpler, you will be able to make use of advanced features and Amore will choose the best defaults for your app.
If you prefer to self-manage S3 you can learn more here.
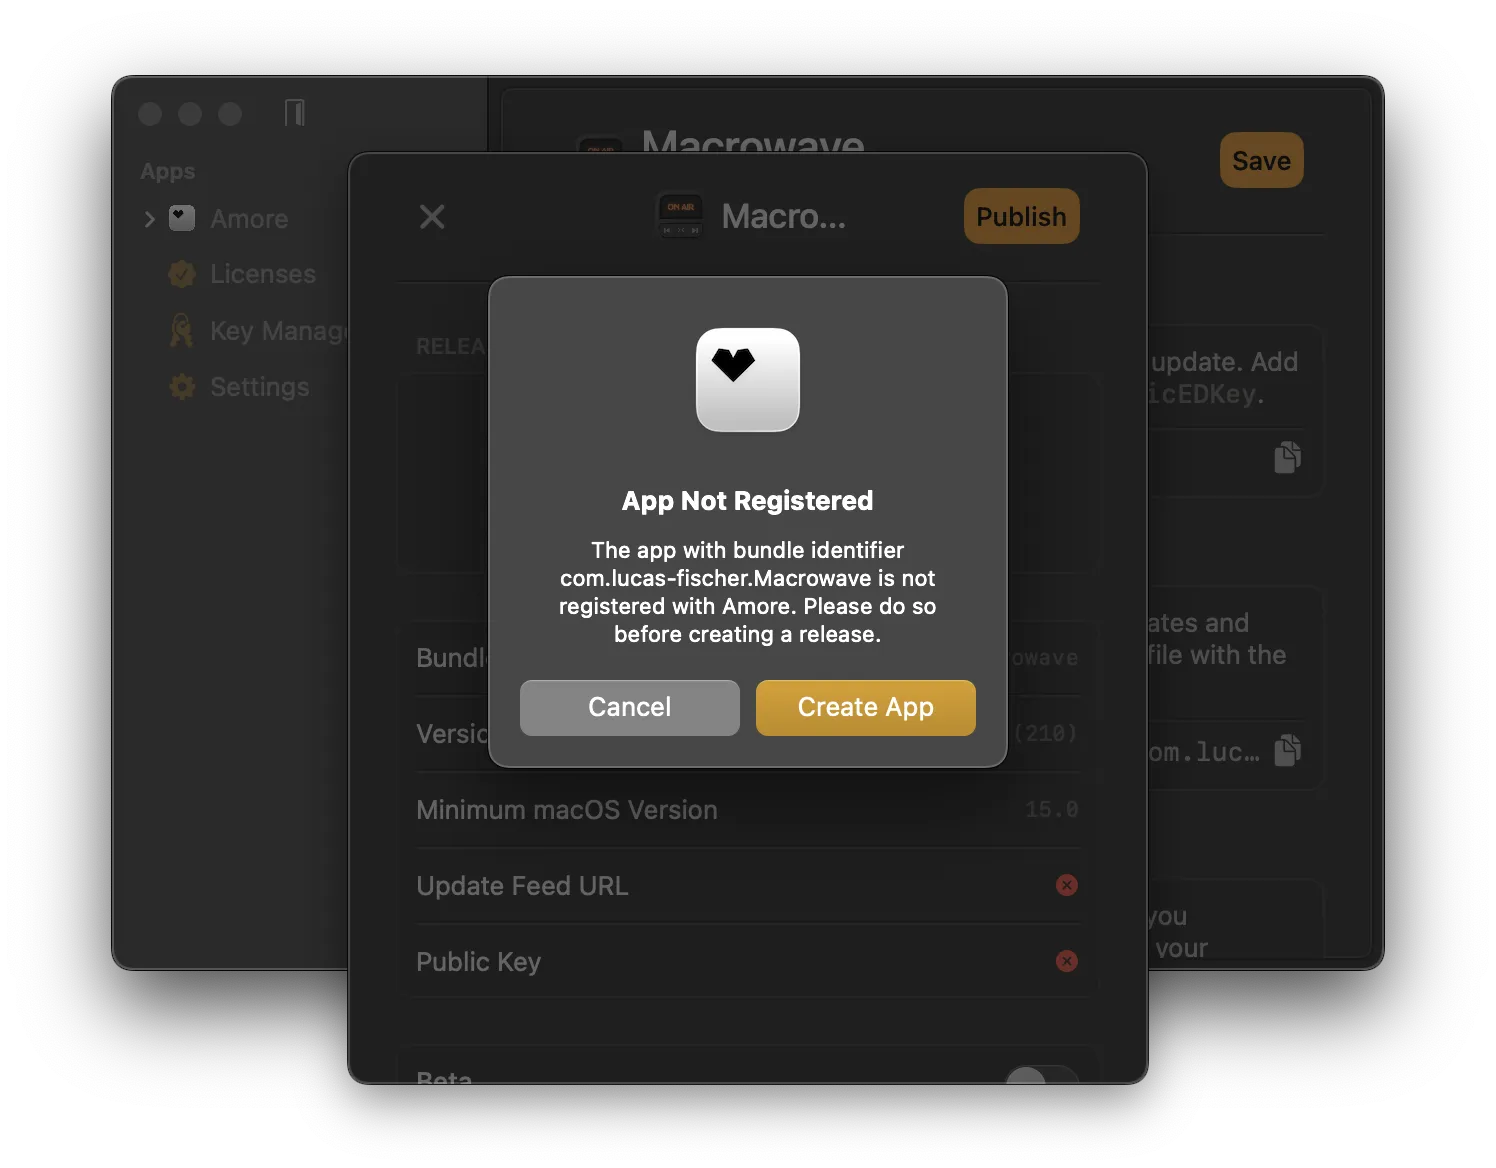 The in-app wizard will take you to through the following steps:
- Register app with Amore / S3 setup
- Creating Sparkle keys for signing app updates
- Adding Sparkle to your project
Please follow the instructions inside the app.
Add Sparkle to your project
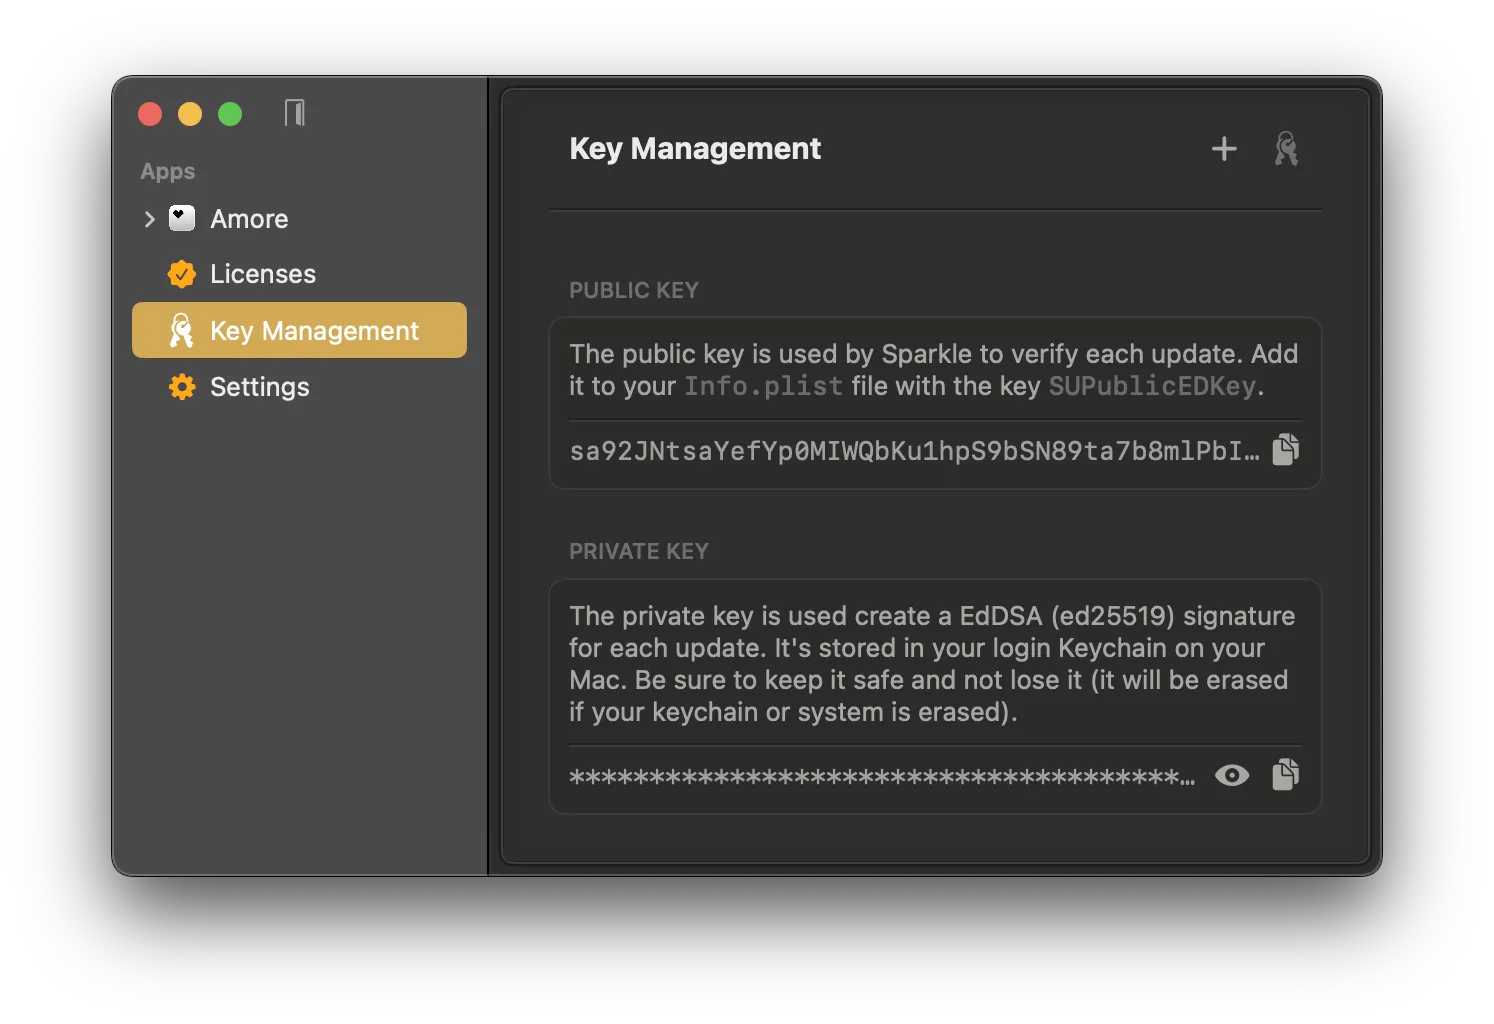
For your app to be able to fetch and download updates you need to add Sparkle to your project.
Sparkle will need the following 2 entries in your Info.plist file to fetch and verify new updates:
- Update Feed URL:
SUFeedURL - Public Key:
SUPublicEDKey
You can find the correct values for these entries in the Sparkle settings in Amore.
 After you added
 SUFeedURL and SUPublicEDKey to your Info.plist you need to add Sparkle as a package dependency and initialize the Sparkle updater SPUStandardUpdaterController class in your source code.
Add Sparkle Package Dependency
- In your Xcode project: File › Add Packages…
- Enter
https://github.com/sparkle-project/Sparkleas the package repository URL
If you use Swift Package Manager (SPM) you can use:
.package(url: "https://github.com/sparkle-project/Sparkle", from: "2.8.1"),Initialize Sparkle
Initialize the SPUStandardUpdaterController in your app's @main entry point. Here is an example for a SwiftUI lifecycle project.
import SwiftUI
import Sparkle

@main
struct AmoreApp: App {

  let updaterController = SPUStandardUpdaterController(
    startingUpdater: true,
    updaterDelegate: nil,
    userDriverDelegate: nil
  )

  var body: some Scene {
    WindowGroup {
      ContentView()
    }
    .commands {
      CommandGroup(after: .appInfo) {
        Button("Check for Updates…") {
          updaterController.updater.checkForUpdates()
        }
      }
    }
  }
}
It is recommend to also add the Check for Updates... menu bar button to be able to manually check for new updates.
If you don't use the SwiftUI app lifecycle you can add it to your app delegate's (NSApplicationDelegate) didFinishLaunchingWithOptions method.
Sandboxing Notes
Sparkle requires additional setup when using the App Sandbox entitlement. For simplicity and the sake of getting started with Amore you can remove this entitlement from your app and add the Hardened Runtime entitlement instead.
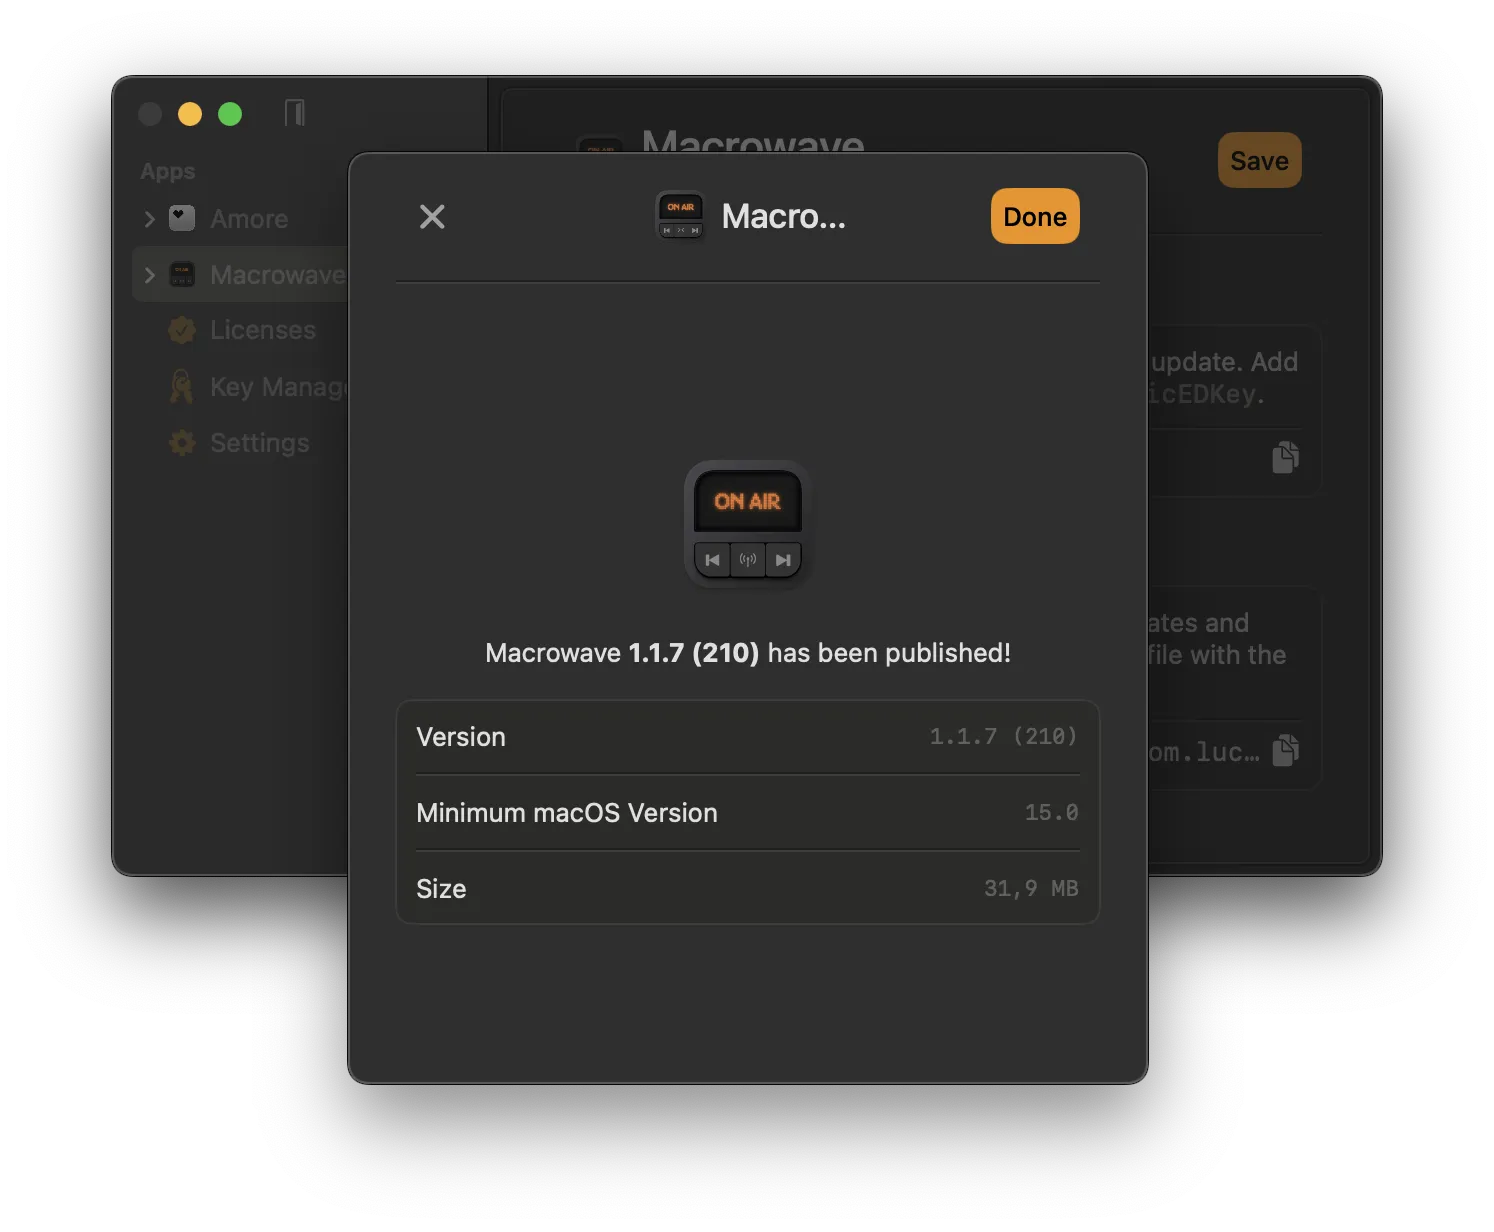
Publish your app
After you added Sparkle and set the correct values in your Info.plist, you are ready to distribute your app with Amore.
Now you can archive your app and select Direct Distribution in the Xcode Organizer to send your app to Apple for notarization. You can follow these steps.
Once the app is notarized you can drag and drop your app binary (.app) into Amore, optionally write release notes and hit publish.
Congrats. You just published your first app with Amore.
Where to go from here?
Whenever you want to release a new version of your app, increment the build number and go through the release process again.
To streamline the release process you can set up the Xcode post-archive action to let Amore take care of code signing and the notarization process after archiving automatically.
If you prefer working from the terminal, the entire workflow — from setup to publishing — can be done via the Command Line without ever opening the app.